
| Project update 2001-10-05 Six months since the last update.
I've been busy with my day work (unfortunately ;-))
Anyway i have made some progress,check it out. |
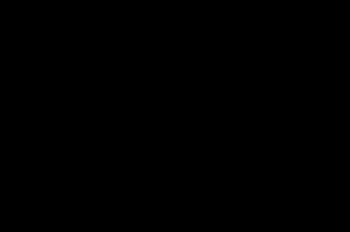
| This is the Original position of the 42 bumper. Way out in the air. |
 |
 |
To tighten it up a bit. I cut out 2 inches of the gravel pan. Used my homemade welding holders, to hold things in position during welding. |
| Its just a bit of square pipe, that i cut a slot in. Welded a small piece of steel to the head of an M6 bolt. And i use a piece of welding rod on the underside. This tool gives me a small 1mm slot. Perfect when you are gas welding. And it keeps the parts in place of course. | 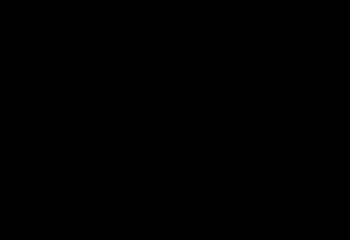 |
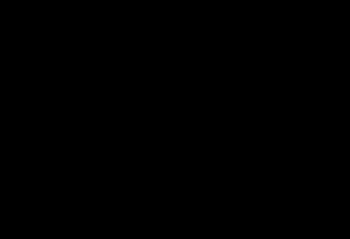 |
I also widened the pan one inch on each side. Looking much tighter or what. Did a similar thing at the rear, but I shortened the bumper 4" before i sent it to the chrome shop. |
| One of the front fenders had some holes in the bottom part. | 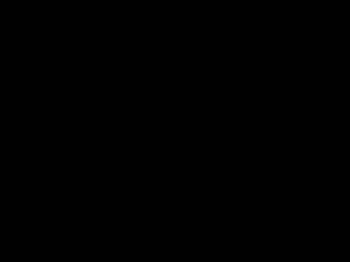 |
 |
First i took a steel rod 12 mm, and bent it to the right radius. |
| Clamped a piece of steel over the radius rod, and hammered away. This was the tricky part to do. |  |
 |
Then i just had to add the rest, that was missing. |
| Some cleaning up with a grinder, and some hammer and dollying and your there (no grinding done in this picture) |  |
 |
This is how i bent the rear part of the fender Outward, in i don't own a shrink/expand tool just hammers and dollies. |
| Hammer time! |  |
 |
I also made the "original" inside reinforcement. |
 |
|
 |
Starts to look ok, some bondo or lead on this would do it. |
| There was some other bumps and dents to fix on the other end to ;-) |  |
 |
Rear fender view. |
| Since i did not have the Gas filler pipe, i made this out of some 2 " exhaust pipe, and the bajonett piece from an Volvo 122 (Amazon) tank, |  |
 |
Looking original in my eyes, Actually have not seen one . but this one works! you can also see my lowering job 6 inches only. This works since i have an rear panhard bar. |
| I'm planning to use the Parking lights as blinkers. but the 18Watt lamp was BIG. And it hit the glass. Reworked version on the left. |  |
 |
I cut of the rear part and added a 12mm long tube piece. That let the lamp sink in, and i could mount the glass. |
| Ready to assemble. |  |
 |
Its good to test the lights before you actually wire the car, so you know everything works. And if there is no light, its your wiring that screwed up. |
| I have not painted the car shiny, since that needed another couple of hundred hours of metal work. I consider this a test assembly. I don't have to be afraid to scratch anything. And i can fit and adjust things properly. And finally matte black is a HOT ROD color. |  |
 |
One smart way is to mount trim and lights when the fender is loose. Its easy to reach from the backside you know. |
| Rear lights ready to go. Yes i had to replace 30-60 % of the tin in the rear lights to |  |
 |
Testing the function, this was a good idea. Since i had some grounding problem, easy to fix when the fender is loose. |
| Find the fault? |  |
 |
Did you notice the missing cowl trim. I could not find one so i had to make my own. Took some junk pieces and made this piece to hammer a bit of a door trim part on. |
| Some hammering and i had an original looking piece with the right angle. |  |
 |
I had to practice on some pieces first. |
| This is how it ended up. i know i still have to adjust the hood, to get the trim to line up. |  |
 |
Starting to look good, to me at least. Still needs some wiring, side windows and so on. |
|
A friend gave me a six way seat, the small problem was
that it was only a one way. Some disassembly and i found two burned coils.
|
 |
 |
Since i live in Sweden, and its far between the American car junk yards, i decided to make my own new coils. |
| I found a pipe with the right diameter. |  |
 |
Wrapped some glass fibre around the pipe, after i had waxed it with car wax, on the out side of the glass fibre i wrapped a piece of plastic bag to get a smooth surface. |
| I cut out some paper that i epoxied to the glass fibre "pipe" |  |
 |
Another friend got me some copper wire with the same gauge as the original wire, 400 turns later i had a new coil. to mount on this steel part. yes i found the reason for the "burnout" it was the toggle switch that had broken and was locked in on position, causing it to overheat. |
| Over to door glass mounting, i had to replace some steel inside the door to. And no this is not the felt i will use, its the old one used for testing only. |  |
 |
The "funny" thing with the 42 is that the steel channel follows the glass down. i think Ford used this design 40-42. |
| Starting to fit together and working properly. |  |
 |
Found this heater at a swap meet this summer. I'm told its from a Ford pickup F1 early fifties. |
| It was NOS, but a small problem is that it don't have a fan! So I'm planning to mount an external one. |  |
 |
Finally a rear view, things are finally coming together ;-) |
Engine:
Type..........Ford flathead 8 BA
Induction....Fenton Manifold 3 Stromberg 81
Camshaft....8BA Truck
Ignition........Original Nos
Exhaust....... Home Built headers.
Heads.......... Original today But I'm looking for some aluminum heads
Not Edelbrock or Offenhauser, Got any ??
Chassis:
Frame..................Original C,ed in rear.
Front suspension..Super bell tube axle 4-inch drop axle Posie spring
split wishbone.
Rear suspension...Original with With long shackles "Special "aircraft" shock kit tube type this was an old after market kit that i found at a swap meet.
Tires, Front/Rear... Firestone 5,60 by 15 8,20 by 15 Whitewalls.
Wheels.................. Volvo 810 15" rims They have the old Ford
bolt pattern.
Drive train:
Transmission........3 speed original gear box.
Rearend...............Original 46 Ford 3,54
Body:
Model..................Business Coupe
Modifications........Removed Running boards, mild custom.
Paint:
Not yet but i think about flat black with flames, suggestions anyone?
Copyright © 1997 Flatlanders, All rights reserved.
No pictures on this home page may be reproduced without written permission of the WEB master.
Edited 980327